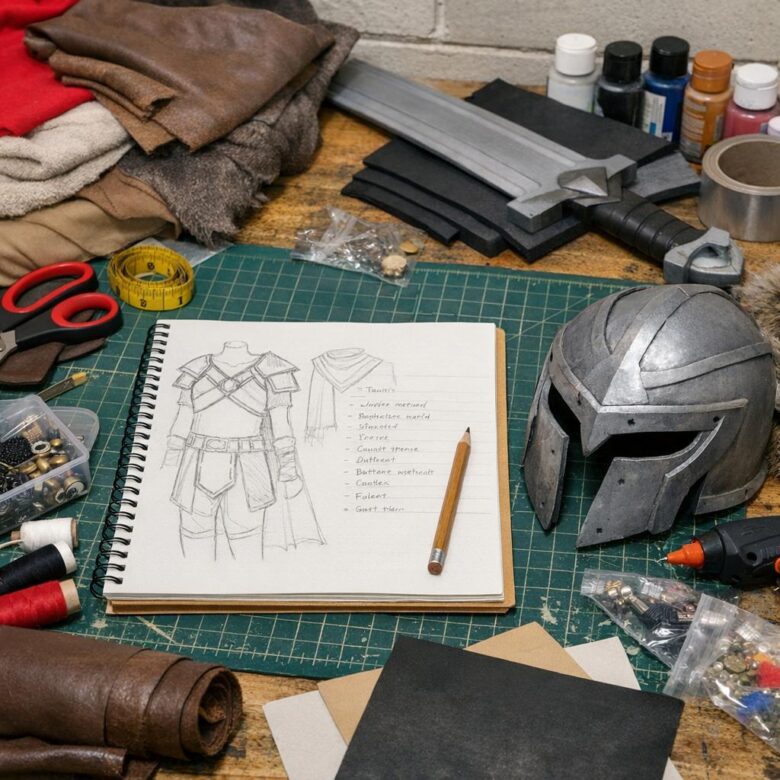
A beginner cosplay does not need expensive materials or advanced sewing skills. The most useful starting point is a clear plan: choose a manageable design, identify the features that make the character recognizable, set a total spending limit, and test the costume before the event.
This guide explains how to plan a complete costume without overlooking shoes, shipping, tools, comfort, repairs, or venue restrictions. It also helps you decide which pieces to buy, make, thrift, borrow, simplify, or leave out.
Start With a Beginner-Friendly Character Design
Your character choice has more effect on the final cost than almost any material decision. Before committing, study several clear references and consider how many specialized parts the costume requires.
A budget-friendly first cosplay usually has several of these features:
- Clothing shapes that resemble ordinary garments
- A limited number of colors and fabric types
- Few armor pieces or rigid structures
- A prop that can be omitted without making the costume unrecognizable
- A wig that needs trimming or light styling rather than complex shaping
- Shoes that can be adapted from something you already own
- Enough visual references to understand the front, back, and sides
Be cautious with designs that combine full armor, large wings, electronics, detailed embroidery, unusual footwear, oversized weapons, and heavily styled wigs. Any one of those elements can be manageable, but combining several in a first project increases the number of tools, materials, and techniques required.
Use the “three identifiers” test
Write down the three features that make the character immediately recognizable. These might be:
- A distinctive hairstyle or wig color
- A signature jacket, uniform, hat, or silhouette
- A recognizable symbol, accessory, or small prop
Prioritize those identifiers before minor details. If the wig, silhouette, and key accessory read clearly, missing buttons or simplified trim are less likely to weaken the overall design.
Create a Reference Sheet Before Shopping
Do not rely on a single promotional image. Character designs may look different across episodes, illustrations, game models, adaptations, or alternate outfits. Collect references that show:
- Front, back, and side views
- Close-ups of accessories and fasteners
- The costume in neutral lighting when possible
- How long coats, skirts, capes, or belts sit on the body
- Which details are printed, sewn, layered, or three-dimensional
Choose one version of the outfit as your main reference. Mixing details from multiple versions can lead to unnecessary purchases and conflicting colors. If an area is never shown clearly, use a simple interpretation that supports comfort and the overall silhouette.
Break the costume into separate parts
Create a list before deciding how anything will be made:
- Hair or wig
- Headwear and face accessories
- Top and outer layer
- Bottom layer
- Belt, harness, jewelry, or other accessories
- Gloves or arm pieces
- Socks, tights, leg pieces, and shoes
- Prop
- Makeup, if wanted
- Undergarments, base layers, and support garments
- Storage and transportation
- Emergency repair supplies
This prevents the common problem of budgeting only for the main garment and discovering later that several smaller parts are still missing.
Set a Complete Cosplay Budget
Choose a maximum amount you can comfortably spend without depending on future discounts or reselling the costume. Then divide the project into three levels.
| Priority | What belongs here | How to use it |
|---|---|---|
| Essential | Base clothing, secure closures, usable footwear, required tools, safety equipment | Fund these items first. |
| Recognizable | Wig, signature colors, emblem, distinctive accessory, character-defining prop | Choose the few elements with the greatest visual effect. |
| Optional | Hidden details, electronics, elaborate weathering, duplicate accessories, premium upgrades | Add only if time and budget remain. |
Track the estimated and actual cost of every part. A simple spreadsheet, notebook, or phone note is enough. Include the costs that are easy to miss:
- Taxes and shipping
- Thread, needles, glue, tape, fasteners, and replacement blades
- Primer, paint, sealant, and applicators
- Wig caps and styling products
- Protective equipment required by the material or tool
- Batteries and spare hardware
- Storage boxes or garment bags
- Transportation fees for oversized props
- Repair supplies for the event
Keep part of the total unassigned until the costume has been tested. That reserve can cover a broken closure, a missing accessory, unsuitable shoes, or a material that does not behave as expected.
Decide What to Buy, Make, Thrift, Borrow, or Skip
DIY is not automatically the cheapest option. A handmade garment may require fabric, lining, a pattern, interfacing, closures, thread, tools, and extra material for mistakes. Compare the complete cost and difficulty of each route.
Buy ready-made when:
- The costume uses a specialized garment that would require unfamiliar construction skills.
- The finished item costs less than the materials and tools needed to make it.
- The event date does not leave enough time for repeated fitting and corrections.
Thrift or modify when:
- An ordinary jacket, shirt, dress, skirt, or pair of trousers has the correct basic shape.
- Only trim, patches, buttons, or small fit adjustments are needed.
- The fabric is suitable for the planned changes.
Make from scratch when:
- The shape cannot reasonably be created from an existing garment.
- You already have the required tools or can borrow them safely.
- The project can be divided into techniques you have time to practice.
Borrow when:
- A tool is needed for only one short step.
- A friend has a suitable accessory, wig stand, sewing machine, or storage solution.
- You can return the item clean and undamaged by the agreed date.
Skip or simplify when:
- The detail is barely visible in normal photos.
- It creates a safety, movement, storage, or venue-policy problem.
- It requires several new tools for a minor visual improvement.
- It could be added later without rebuilding the costume.
Shop for Shape and Function, Not Just Color
When adapting secondhand or ordinary clothing, silhouette and fit are usually more important than an exact color match. Check shoulder width, garment length, collar shape, sleeve volume, and how the piece layers over the rest of the costume.
Before buying a garment to modify, inspect:
- Seam allowance and whether the item can be altered
- Fabric stretch and thickness
- Existing stains, peeling coatings, or weak seams
- Whether patches or trim can be attached without damaging the fabric
- Care instructions and heat sensitivity
- Comfort when sitting, bending, and lifting your arms
Changing a garment’s color can be less predictable than it appears. Dyes depend on fiber content, and paints can affect texture or flexibility. Read the manufacturer’s directions, check fabric compatibility, and test on a hidden area or scrap before treating the whole item.
A hypothetical low-complexity plan
Suppose a character wears a dark jacket, plain trousers, gloves, a colored scarf, and a small badge. A budget-focused plan could be:
- Use trousers and shoes already owned.
- Thrift a jacket based on shape and fit.
- Make the badge from lightweight craft material.
- Buy or repurpose a scarf in the signature color.
- Leave a nonessential background prop for a later upgrade.
This approach concentrates effort on the character’s recognizable colors and silhouette instead of recreating every detail at once.
Plan Props Without Creating Transport or Safety Problems
A large prop may require more money for reinforcement, paint, storage, and transportation than expected. Before building one, answer these questions:
- Will it fit through doors and into the planned vehicle or public transport?
- Can it be carried for an extended period without strain?
- Can it be disassembled for storage?
- Does it have sharp points, rigid edges, loose parts, or exposed wires?
- Will the venue allow its size, materials, and construction?
Convention and event policies vary. Check the organizer’s current official rules for prop dimensions, prohibited materials, inspection procedures, peace-bonding, masks, realistic weapon replicas, and storage. Do this before buying materials, because a prohibited prop may not be allowed inside even if it is lightweight or nonfunctional.
For display props, lightweight materials are often easier to carry than solid wood or metal. However, foam, cardboard, plastics, paints, adhesives, and sealants have different handling requirements. Follow product labels, use appropriate ventilation and protective equipment, and avoid heat or chemicals that are not compatible with the material.
Spend for Comfort Before Decorative Upgrades
A costume that looks accurate while standing still may be difficult to wear for several hours. Test the complete outfit rather than checking each item separately.
Put everything on and try to:
- Walk at a normal pace and use stairs
- Sit without crushing rigid pieces
- Raise and rotate your arms
- Turn your head and see clearly
- Use a phone and carry personal items
- Remove the costume or use a restroom without extensive help
- Breathe comfortably and avoid excessive heat
Pay particular attention to footwear, masks, tight collars, body paint, rigid armor edges, and anything held on with adhesive. A small comfort problem during a short fitting can become a reason to stop wearing the costume at an event.
If the design includes decorative contact lenses, do not treat them as an ordinary costume accessory. Requirements differ by location, so consult an appropriately qualified eye-care professional and follow applicable health guidance. Never share lenses, and do not use a product that causes pain, redness, or impaired vision.
Use a Timeline That Leaves Room for Failure
Work backward from the event date and finish wearable pieces before optional details. A practical order is:
- Choose the design: collect references and identify the three defining features.
- Inventory what you own: check clothing, shoes, tools, and reusable materials.
- Set the spending limit: include supplies, shipping, safety equipment, and transport.
- Secure the base costume: obtain the main garments and confirm the fit.
- Practice unfamiliar techniques: test paint, glue, stitching, or wig styling on scraps.
- Build the essential details: complete emblems, trim, accessories, and closures.
- Perform a full wear test: move, sit, carry the prop, and check visibility.
- Make repairs and simplify: remove unstable details instead of adding last-minute complexity.
- Pack early: organize the costume, repair supplies, and any removable parts.
Allow adhesives, paint, and sealants the full curing or drying time stated by their manufacturers. Rushing these steps can damage surfaces, transfer color to clothing, or cause parts to separate.
Common Budget Cosplay Mistakes
Buying before making a complete list
A discounted material is not a bargain if it does not suit the design. Finish the costume breakdown and reference sheet before shopping.
Purchasing a specialized tool for one minor detail
Compare borrowing, renting where available, using a simpler technique, or omitting the detail. Include required accessories and safety equipment when comparing tool costs.
Making every part from scratch
Handmaking ordinary shirts, trousers, or jackets can cost more than adapting existing garments. Reserve custom construction for pieces that need a unique shape or function.
Ignoring shipping and delivery uncertainty
Seller location, processing time, customs procedures, and return policies can change the practical cost of an item. Verify the current details shown by the seller before ordering, and avoid relying on a delivery that leaves no time for alterations.
Choosing accuracy over movement
Oversized props, unstable footwear, limited visibility, and tightly fitted pieces can make a costume difficult to wear. Adjust the design for the actual activity and venue.
Skipping material tests
Glue can melt foam, paint can crack on flexible surfaces, and heat can deform synthetic materials. Test the full sequence—adhesive, primer, paint, and sealant—on a scrap first.
Leaving the wig and shoes until last
Both can affect the costume’s appearance and comfort substantially. Include them in the initial plan, even if the final decision is to use natural hair or footwear already owned.
Trying to finish every optional detail
A clean, wearable costume with simplified details is usually a better outcome than an unfinished costume containing several ambitious components.
Pack a Small Cosplay Repair Kit
Choose supplies that match the costume rather than carrying every tool used during construction. A basic kit might include:
- Safety pins and a few spare fasteners
- Needle and thread in relevant colors
- Fashion tape or another skin-safe product, if suitable
- Small pieces of matching hook-and-loop tape
- Spare batteries for approved electronic elements
- Blister care and any personal comfort items
- A labeled bag for detached accessories
Some venues restrict scissors, blades, aerosols, adhesives, or other tools. Review the current official venue policy before packing a repair kit.
Final Planning Checklist
- The character design matches your available time, skills, workspace, and budget.
- You selected one clear version of the outfit to follow.
- The costume is divided into individual parts.
- Every part is marked buy, make, thrift, borrow, use from home, or skip.
- Shipping, tools, consumable supplies, safety equipment, and transport are included.
- The three most recognizable character features receive priority.
- Materials and adhesives have been tested on scraps.
- The costume allows safe walking, sitting, breathing, and visibility.
- Props comply with the event’s current official rules.
- The full outfit has been worn together before the event.
- Removable pieces are labeled and packed securely.
- A small amount of time and budget remains for repairs.
The best first cosplay is not the one with the most components; it is the one you can complete, afford, transport, and wear comfortably. Focus on a recognizable silhouette and a few defining details. Once the basic costume works, extra trim, upgraded props, and more advanced techniques can be added later.

The Enfet Otaku Life Editorial Team creates and maintains practical guides about anime viewing, conventions, cosplay, collectibles, merchandise, and licensed streaming. The site focuses on clear, useful information and encourages readers to verify time-sensitive details with official sources.