Convention photography is a speed-and-control problem: the photographer has limited time, mixed lighting, crowded backgrounds, and a costume that may include reflective armor, dark fabric, a mask, or an oversized prop. Better results come from making a few deliberate choices before taking the photo.
The goal is not simply to record the costume. A strong cosplay photo shows its construction clearly, supports the character’s personality, and avoids distractions without disrupting the convention or making the cosplayer uncomfortable.
Before Taking the Photo: Permission, Safety, and Expectations
Always ask before photographing a cosplayer, even if other attendees are already taking pictures. A costume is not automatic consent to be photographed, and consent to take a photo does not necessarily include permission to touch the costume, reposition a prop, or post the image online.
- Ask clearly: “May I take a photo?” is better than raising the camera and waiting for a reaction.
- Move only when practical: If the current spot is crowded, ask whether the cosplayer is comfortable moving to a nearby wall or open area. Do not pressure anyone into leaving their group.
- Keep directions respectful: Describe the pose or angle rather than touching the person or costume.
- Confirm posting preferences: If the image may be shared publicly, ask whether the cosplayer wants to be tagged or credited and how they prefer to be identified.
- Respect the first answer: A refusal does not require an explanation.
Do not block exits, escalators, accessibility routes, vendor entrances, or emergency equipment. Rules for photography equipment, tripods, light stands, flash, and designated shooting areas vary by event and venue, so check the convention’s official policy before attending.
Choose the Background Before Adjusting the Camera
A cleaner location usually improves a convention portrait more than a minor camera-setting change. Scan the entire frame, not just the cosplayer.
- Look behind the head: Signs, poles, doorframes, and other attendees can appear to grow out of the subject.
- Check the floor: Bags, bottles, cables, and discarded badges are easy to miss while concentrating on a face.
- Match the setting to the character: Concrete, metal, and strong geometric lines can suit armored or science-fiction designs. Soft daylight and simple colored walls may work better for fantasy or magical-girl costumes.
- Create distance from the background: When space permits, placing the cosplayer farther from the wall or crowd makes it easier to reduce background detail.
- Change camera position: Moving a few steps sideways or lowering the camera can hide clutter without requiring the cosplayer to relocate.
If a clean background is unavailable, frame a tighter portrait, use a doorway or pillar as a visual border, or position the subject so their body blocks the most distracting area. Avoid asking someone to stand in an unsafe or restricted location for the sake of the shot.
Work With Convention Lighting Instead of Fighting It
Convention halls often contain several light sources at once: ceiling fixtures, display screens, colored booth lights, daylight, and flash. Mixed lighting can produce green skin tones, unexpected color casts, and bright reflections on armor.
Start by finding the best available light
Open lobbies, large windows, shaded outdoor areas, and pale walls can provide softer light than overhead fixtures. Position the cosplayer so the brighter light falls from the front or slightly to one side. This generally reveals facial features and costume texture more clearly than placing the strongest light directly behind the subject.
Backlighting can still work, but expose for the face rather than the window or bright doorway. A small amount of fill light may help when the face is deeply shadowed.
Use flash carefully
Direct flash can create hard shadows and bright reflections, especially on glossy armor, visors, metallic fabric, and makeup. If flash is allowed, a bounced or diffused light may produce a softer result. Bounce flash depends on having a nearby neutral-colored surface; bouncing from a colored wall can tint the subject.
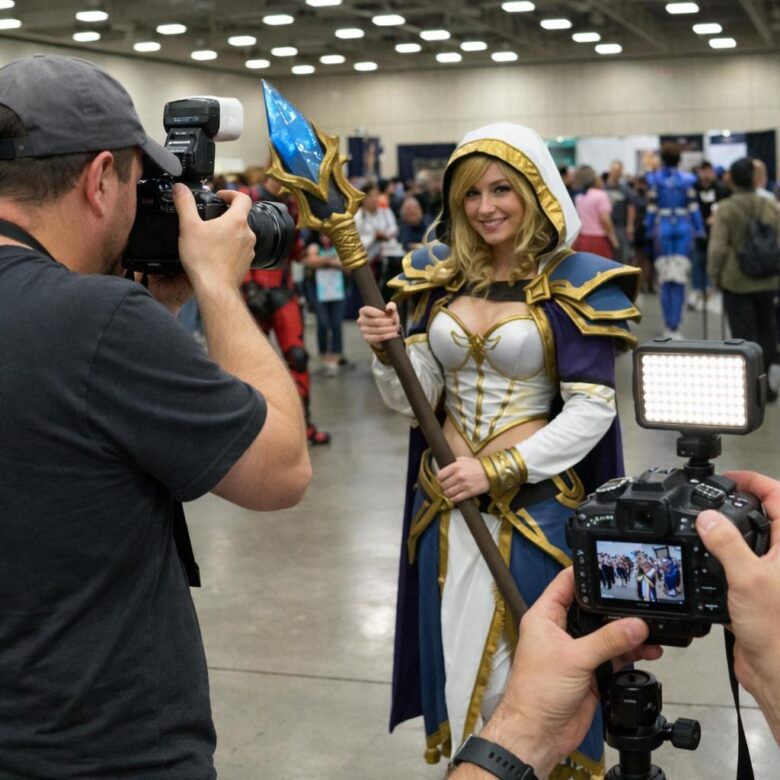
Portable lights should never obstruct walkways or shine into nearby attendees’ eyes. Confirm the event’s equipment and flash rules before using stands, modifiers, or repeated flash.
Reliable Camera Settings for Fast Convention Portraits
There is no single correct exposure for every hall. Use the following as decision criteria rather than fixed settings.
- Shutter speed
- Choose a speed fast enough to control movement from both the cosplayer and the photographer. Increase it for moving capes, action poses, or handheld shots with a longer lens. If images are blurred despite accurate focus, shutter speed is the first setting to reconsider.
- Aperture
- A wide aperture can soften a busy background, but extremely shallow depth of field may leave the eyes, mask, prop, or costume details out of focus. Stop down when photographing a group, a deep pose, or a large prop extending toward the camera.
- ISO
- Raise ISO when necessary to maintain a usable shutter speed. Some visible noise is usually easier to address than motion blur, but very high ISO can remove fine texture from wigs, makeup, and fabric. Review a magnified test image when lighting changes.
- Focus mode
- Continuous autofocus can help when the subject is moving. Eye detection may be useful for an uncovered face, but it can struggle with masks, colored contacts, heavy makeup, helmets, or foreground props. Check where the focus box lands and switch to a deliberate focus point when needed.
- File format
- RAW files provide more flexibility for correcting exposure and mixed lighting. JPEG requires less storage and editing. Recording both can be useful when quick sharing and later editing are both priorities, provided the memory card and camera can handle the additional data.
Camera controls and autofocus behavior differ by model. Consult the manufacturer’s manual before the convention and assign important functions—such as ISO, focus-area selection, or exposure compensation—to controls that can be reached quickly.
A simple setup sequence
- Set the aperture according to how much of the costume must remain sharp.
- Select a shutter speed that can freeze the intended pose.
- Raise ISO until the exposure is usable.
- Take a test frame and check the face, eyes, and brightest costume areas.
- Adjust after moving to a new lighting zone rather than assuming the previous settings still work.
Phone Photography Tips for Convention Floors
A phone can produce a strong cosplay photo when the photographer controls light, framing, and camera distance.
- Clean the lens: Fingerprints create haze and exaggerated light streaks.
- Use the main rear camera when possible: It is often the most capable camera on the device, although hardware varies by model.
- Avoid unnecessary digital zoom: Move closer when it is safe and comfortable, or crop moderately afterward.
- Tap to focus on the face or mask: Adjust exposure if the phone makes bright armor or a pale costume lose detail.
- Hold the phone level: A tilted frame can make walls and columns distracting unless the angle is an intentional part of the composition.
- Use portrait mode selectively: Artificial background blur can make mistakes around wigs, translucent fabric, fingers, and intricate props. Take a standard photo as a backup.
- Keep the phone slightly farther away for portraits: Photographing a face from extremely close range can exaggerate nearby features.
Direct Poses Without Overcomplicating the Session
Give one instruction at a time. Short directions are easier to follow in a loud hall and allow the cosplayer to adapt the idea to the costume.
- “Turn your shoulders slightly toward the light.”
- “Bring the prop closer to your body.”
- “Look just past the camera.”
- “Shift your weight to the back foot.”
- “Hold that pose while the crowd clears.”
Start with a neutral full-body frame so the complete costume is documented. Then move to a three-quarter composition, a close portrait, or an action pose if time and space allow.
Pose for the costume’s construction
- Armor: Turn the body slightly so chest, shoulder, and arm pieces do not merge into one flat shape. Watch for glare that hides painted details.
- Capes and coats: Allow room around the body so the silhouette remains visible. Any movement should be controlled and kept away from nearby attendees.
- Large props: Angle the prop through the frame rather than holding it directly across the torso. Avoid cropping its tip by accident.
- Masks and helmets: Use body angle, hands, and prop placement to communicate emotion when the face is hidden.
- Detailed makeup: Capture a close frame in even light before switching to wider action poses.
- Groups: Place faces at different heights, keep each costume visible, and use enough depth of field to hold the group in focus.
Reference images can help identify a character’s signature stance, but they should be treated as inspiration rather than a demand. Some poses may be uncomfortable or impossible because of footwear, armor, mobility needs, visibility through a helmet, or the physical limitations of a prop.
Composition Choices That Make Photos Feel Intentional
Before pressing the shutter, decide what the picture is meant to emphasize: the full costume, the character’s expression, a handmade prop, or an action moment. The answer determines the framing.
- Full-body frame: Leave space around hats, shoes, wings, and props. Check every edge before shooting.
- Three-quarter frame: Useful for showing the face and much of the costume while reducing floor and ceiling clutter.
- Close portrait: Best for makeup, wigs, helmets, jewelry, and facial expression.
- Low angle: Can make a heroic character appear imposing, but may also exaggerate nearby limbs or reveal distracting ceiling fixtures.
- Eye-level angle: A dependable choice for natural proportions and character-focused portraits.
Leave space in the direction the character is looking, moving, or aiming. If a sword or staff forms a strong diagonal, use it to guide attention into the frame rather than out of it. Be especially careful about cropping at joints; cuts through wrists, ankles, or knees often appear accidental.
Handling Crowds and Short Shooting Windows
A convention floor rarely stays clear for long. Prepare the frame before asking the cosplayer to hold a demanding pose.
- Choose the background and exposure first.
- Explain the pose briefly.
- Wait for a temporary gap in foot traffic.
- Take a short sequence rather than filling the memory card with near-identical images.
- Check one frame for focus, blinking, reflections, and accidental background intrusions.
- Thank the cosplayer and clear the area promptly.
Do not ask someone to repeat jumps, spins, kneeling poses, or weapon movements unless there is enough space and the cosplayer agrees. Costumes can restrict vision, balance, breathing, and movement in ways that are not obvious to the photographer.
Edit Without Losing Costume Accuracy
Post-processing can correct exposure and color, but it should not erase the qualities that make the costume distinctive. Start with global corrections before using detailed retouching.
- Correct overall exposure while protecting bright armor, white fabric, and illuminated props.
- Adjust white balance using a neutral object when one is available, then check whether skin, wig, and costume colors still look plausible.
- Crop distractions without cutting off intentional costume elements.
- Apply noise reduction carefully so fabric texture, wig strands, weathering, and makeup remain visible.
- Use selective contrast or sharpening on important details rather than applying an aggressive effect to the entire image.
Mixed lighting may not be fixable with one white-balance adjustment. If the face is lit by a window while the costume is affected by colored booth lighting, local adjustments may be needed. When color accuracy matters, a neutral reference frame taken in the same light can provide a useful starting point.
Avoid reshaping bodies or changing costume colors without explicit agreement. If an edited image is intended for delivery to the cosplayer, discussing major compositing or retouching choices can prevent unwanted surprises.
Common Mistakes and Their Practical Fixes
| Problem | Likely cause | Practical fix |
|---|---|---|
| The eyes or mask are soft | Focus landed on the wig, prop, or nearest armor piece | Select a smaller focus area, stop down if needed, and inspect a magnified test frame |
| The entire subject is blurred | Shutter speed was too slow for movement | Use a faster shutter speed and raise ISO or add permitted light |
| Skin looks green or orange | Mixed convention lighting or incorrect white balance | Move to a more consistent light source, record RAW, or correct areas selectively |
| White fabric has no detail | Highlights are overexposed | Reduce exposure and check the brightest costume area, not only the face |
| The background is distracting | Insufficient subject separation or poor camera position | Move sideways, frame tighter, increase subject-to-background distance, or use a wider aperture carefully |
| Armor has harsh bright spots | Direct flash or a concentrated overhead light | Change the angle between light, costume, and camera; use softer permitted light |
| The pose feels unrelated to the character | No clear concept was chosen before shooting | Use a reference or ask the cosplayer for a preferred signature pose |
| Portrait-mode blur damages the costume outline | Software misread wigs, fingers, fabric, or props | Take a standard phone photo as a backup and reduce artificial blur |
Quick Convention Photo Checklist
- Photography permission requested
- Posting or credit preferences clarified when relevant
- Walkways, exits, and vendor access kept clear
- Background checked from edge to edge
- Face or mask placed in usable light
- Shutter speed suitable for the pose
- Focus confirmed on the intended feature
- Bright costume details protected from overexposure
- Props, wings, hats, and shoes intentionally included or cropped
- One full-body frame and one closer frame captured when time allows
- Cosplayer thanked before moving on
Final Takeaway
Better convention photos do not require the most complicated setup. Prioritize permission, a clean background, usable light, accurate focus, and a pose that suits the character. Check the frame for small problems before taking more photos, and adapt the technique to the costume rather than forcing every cosplayer into the same composition.
A simple sequence—ask, position, expose, direct, check, and thank—keeps the process efficient while giving the costume and its wearer the attention they deserve.
The Enfet Otaku Life Editorial Team creates and maintains practical guides about anime viewing, conventions, cosplay, collectibles, merchandise, and licensed streaming. The site focuses on clear, useful information and encourages readers to verify time-sensitive details with official sources.